Quickstart
Creating pictures from the TextGridEditor window
A good point to start is the TextGridEditor (Fig. 5), the window we usually use when working with sounds and annotations.
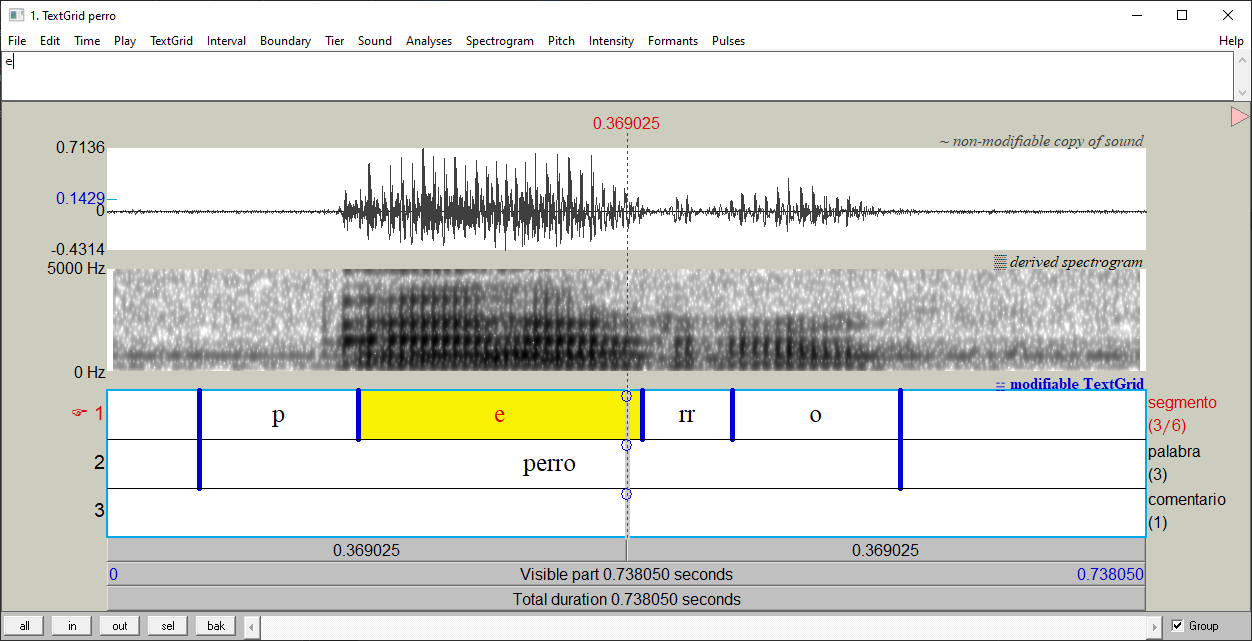
Fig. 5 The TextGridEditor window
Activate the plug-in commands
The plug-in comes with a set of commands that can be found in the TextGridEditor
menu. These commands are deactivated by default. To activate them, go to the
plug-in menu in the Objects window (Praat > Goodies > TGDraw)
and click on the command TextGridEditor preferences. In the dialogue
box, check the button Show commands in TextGridEditor and press Ok, then
restart Praat. Once this is done, open a Sound and its TextGrid in the
TextGridEditor. Now, when you navigate on the Pitch and Spectrogram menus, you
will see that there are some new items at the end of each menu list
(see Fig. 6).
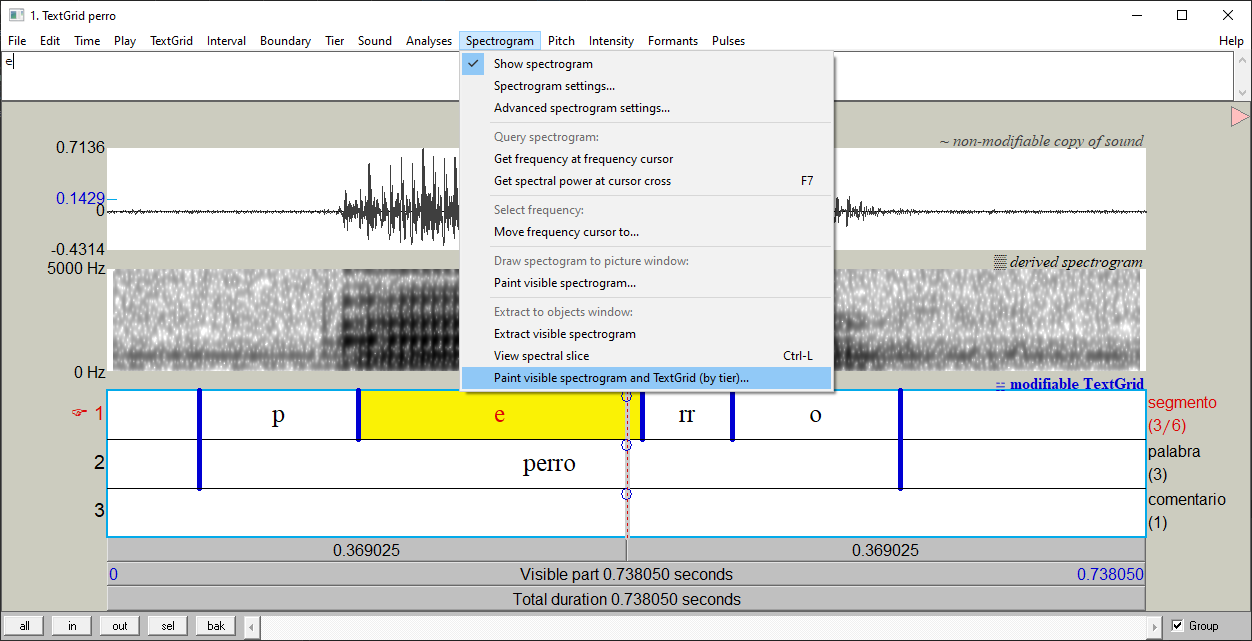
Fig. 6 The Spectrogram menu
These are the commands added:
Spectrogram menu
Paint visible Spectrogram and TextGrid (by tier)...
Pitch menu
Draw visible pitch contour and TextGrid (by tier)...Draw visible pitch intonation (by tier)...
Time menu
Save selection time...
Warning
The commands added to the TextGridEditor cause that Praat raises
a warning message when you open a TextGrid alone. This can be annoying. You
can avoid this behavior by using the button View & Edit alone (no warn).
This button is automatically added when you install the plug-in.
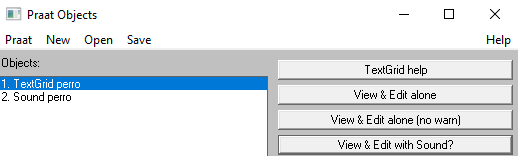
Fig. 7 Open a TextGrid without warning messages
You can also deactivate the TextGridEditor commands.
Picture a Spectrogram and TextGrid
For this example, open a Sound and its TextGrid object in the TextGridEditor as in Fig. 8.
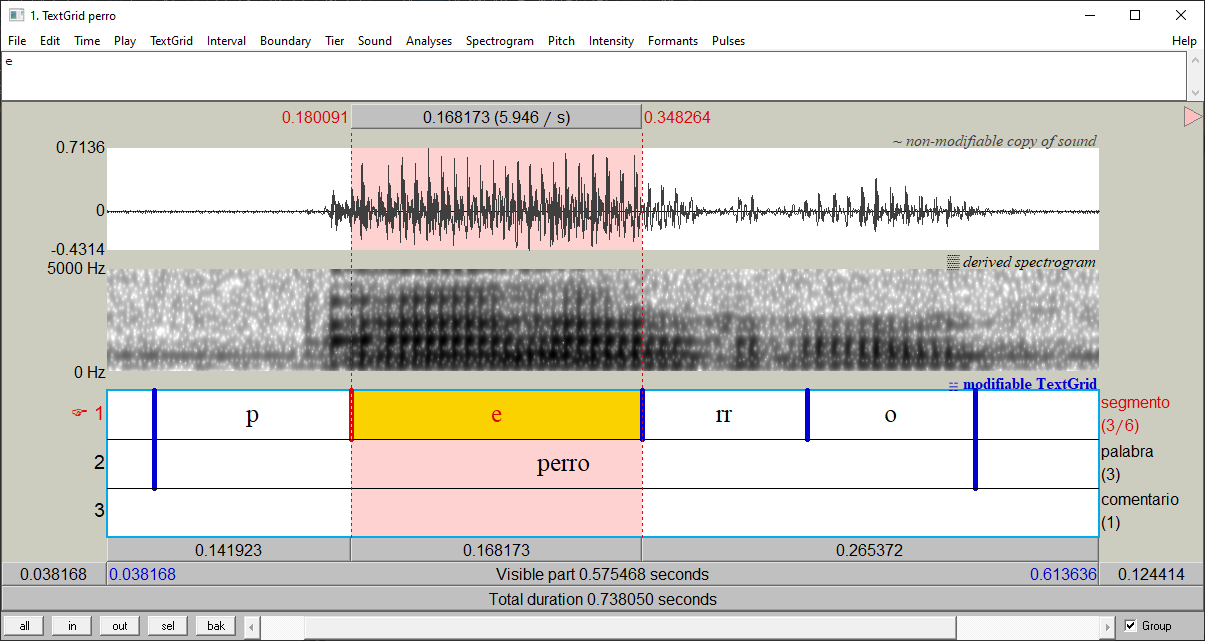
Fig. 8 Selection in the TextGridEditor
Note that in the figure, the current view is set to match the transcribed word.
I have also selected the portion of time correponding to the vowel e.
Go to the Spectrogram menu and click on the command
Paint visible spectrogram and TextGrid (by tier).... A dialogue box similar
to the Fig. 9 will appear. Leave the
default options and click on Ok.
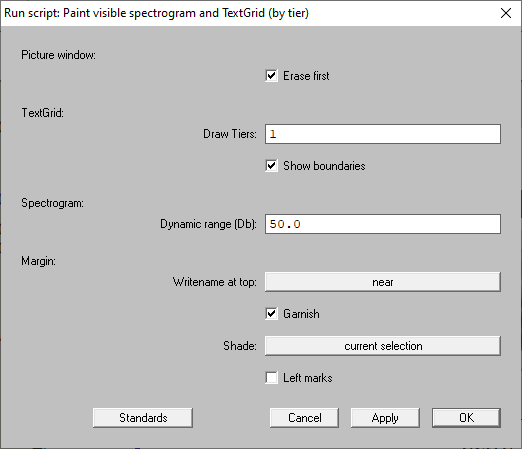
Fig. 9 Dialogue box
You will get a picture as in Fig. 10.
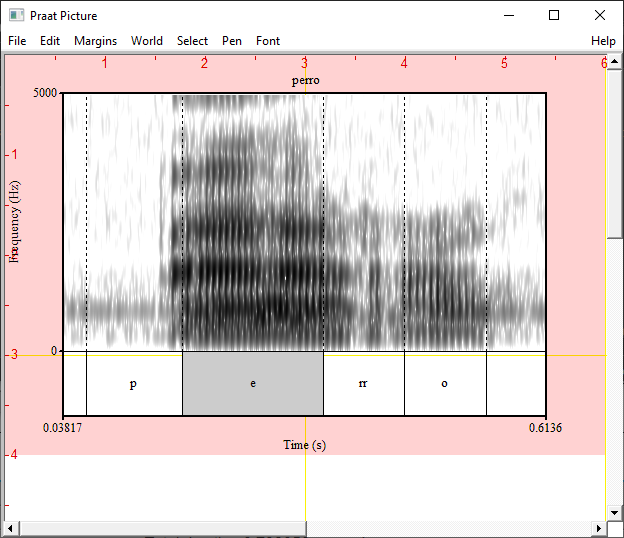
Fig. 10 Resulting picture
As you can see, the plug-in captures the current view of the TextGridEditor and put it into the Praat Picture window. Here, the spectrogram and the first tier of the TextGrid are shown. The selection we did is also hightlighted.
We can tweak our picture by changing some of the values in the dialogue box.
For example, if we want to that our picture includes the second and first tier
of the TextGrid, in that order, we can set the Draw tiers field to 2, 1.
This will print the Fig. 11.
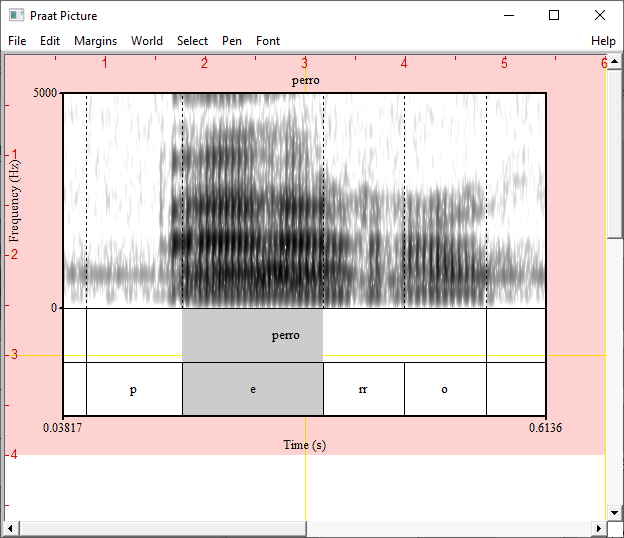
Fig. 11 Printing the tier 2 and 1 (in that order)
We can shade multiple selections in our picture. To do that, we use the command
in the Time menu, Time > Save selection time.... When you open it, the
dialogue in Fig. 12 will pop up.
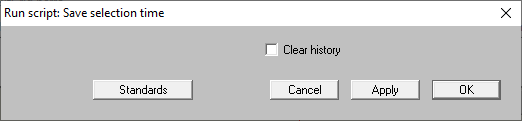
Fig. 12 The Save selection time... dialogue box
The mechanism is simple: for each time you select an interval, click on the
Apply button of the dialogue box. Repeat this process as many times as needed.
When you add a selection, it will be printed in the Info window. In the
Fig. 13, I have added the intervals corresponding to the vowels
e and o.
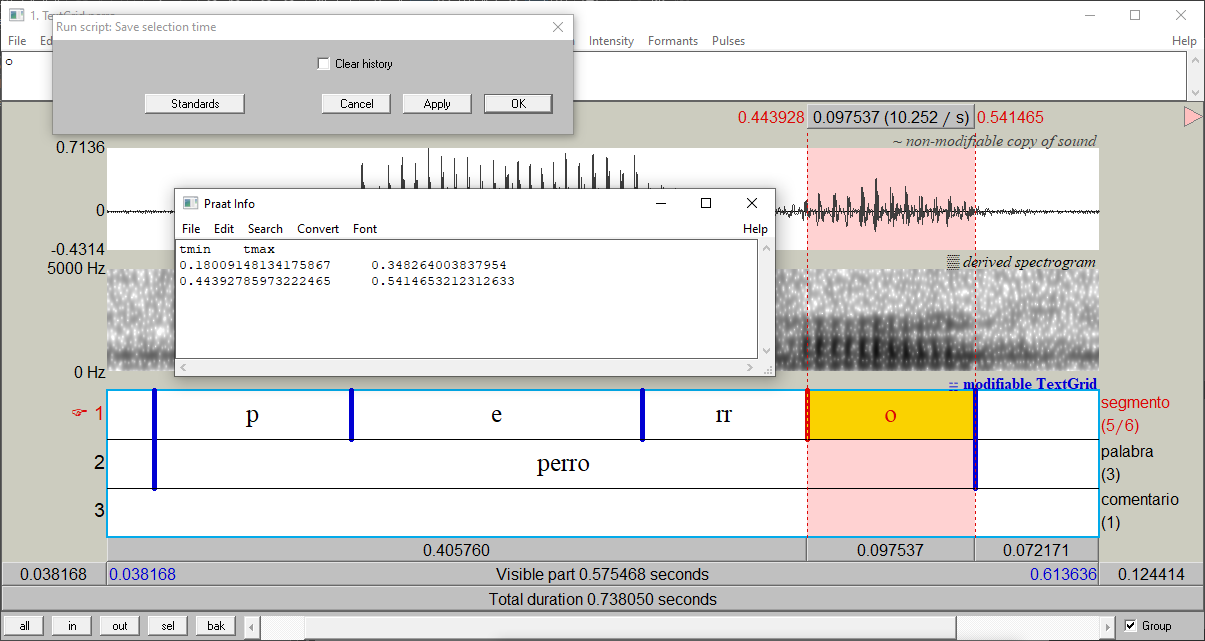
Fig. 13 The Save selection time... dialogue box
When you are done, close the dialogue and return to the
Paint visible spectrogram and TextGrid (by tier)... command. Now, focus on
the Shade field and pick the option buffer, then click on Ok. You
will get a picture as in Fig. 14.
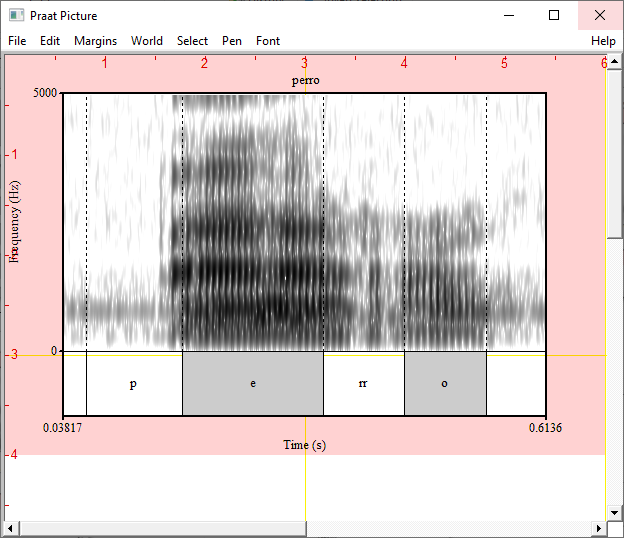
Fig. 14 Resulting picture
Picture Pitch and TextGrid
Creating a picture that includes Pitch and TextGrid is easy. First, make sure
that the pitch is visible in the spectrogram, and then go to
Draw visible pitch contour and TextGrid (by tier)....
Picture Pitch, Spectrogram and TextGrid
pass